Khi mới cài Win server, bạn chưa thể tải bất kỳ thứ gì trên internet về. Vậy làm thế nào để tải và cài Chrome? Bài viết này sẽ hướng dẫn chi tiết cách cài Google Chrome cho WinServer.
Mục lục
Mục lục
1. Cách 1: Cài Chrome cho WinServer qua RDP
RDP hỗ trợ cho phép chuyển file (dung lượng dưới 2GB) từ client tới server. Vì vậy, bạn có thể tải file cài của Chrome về PC và copy lên server.
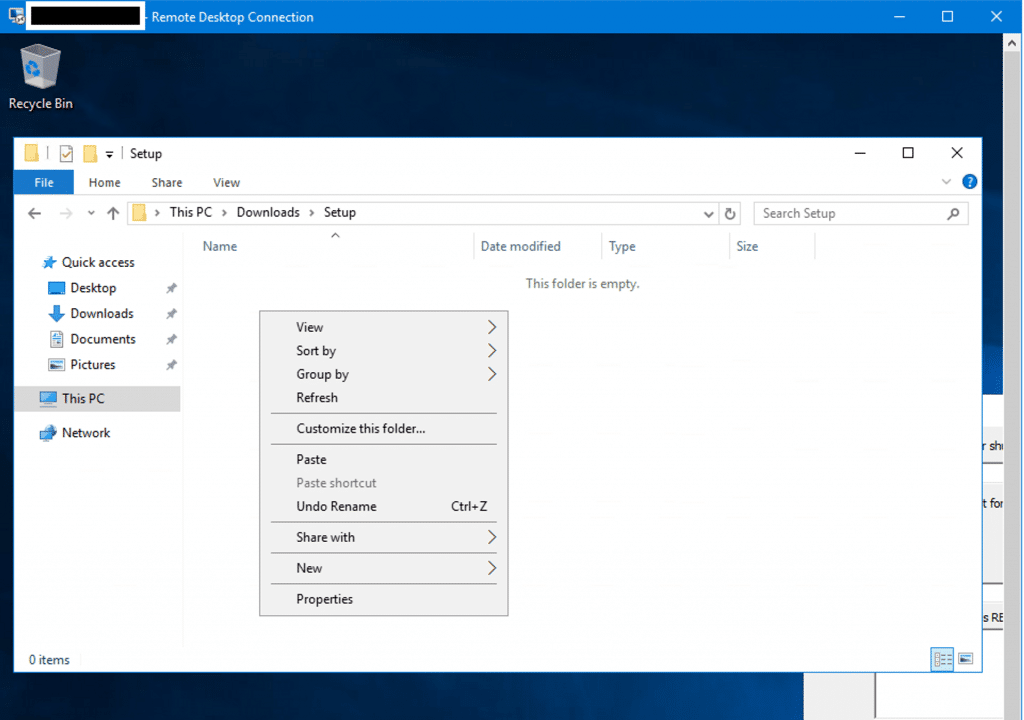
Bước 2: Vào nơi chứa file cài vừa tải về trên PC, chọn file và ấn Ctrl+C để copy
Bước 3: Vào 1 thư mục bất kỳ trong server rồi Ctrl+V. Truyền file xong, bạn chỉ việc cài đặt như bình thường.
2. Cách 2: Cài thông qua IE của server
2.1. Bật chức năng download
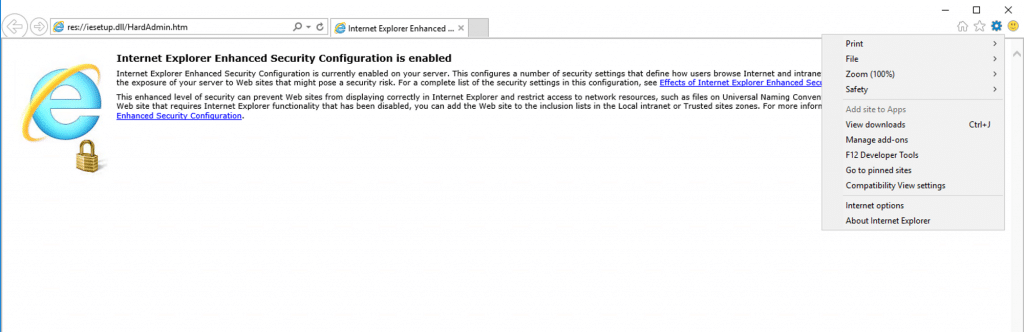
IE mặc định chặn tải xuống. Do đó, trước hết, chúng ta cần bật chức năng download lên bằng cách sau:
Bước 1: Click biểu tượng răng cưa ở góc ⇒ chọn Internet option
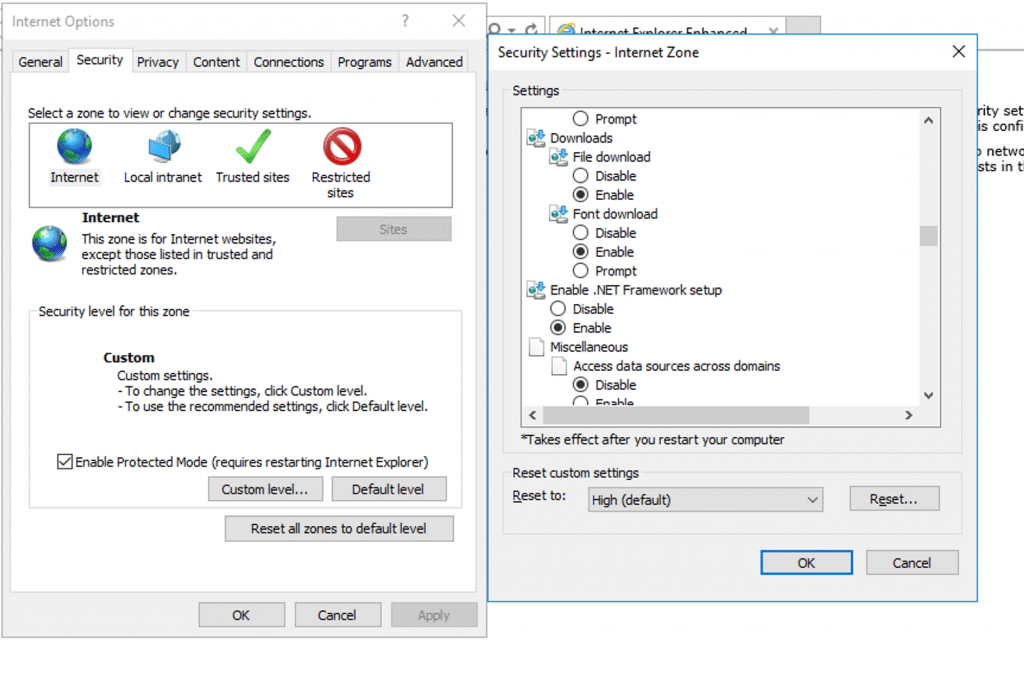
Bước 2: Khi bảng chọn Internet Options xuất hiện, chọn tab Security ⇒ Custom level. Khi đó sẽ hiện ra hộp thoại Sercurity Setting, chọn enable ở các mục như trong hình.
2.2. Bỏ chặn nội dung trang
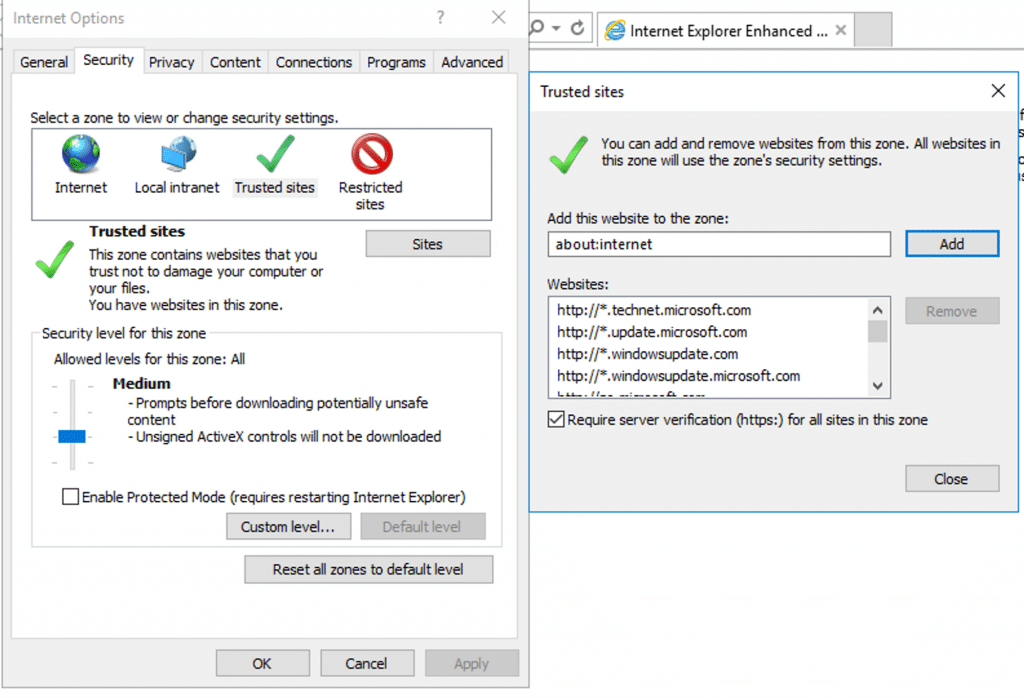
Ngoài ra, IE cũng chặn nội dung trang, khiến khi vào web Chrome sẽ bị trắng xóa. Bạn cần add địa chỉ của web Chrome vào Trusted sites để hiện nội dung web: Tại tab Sercurity của hộp thoại Internet option, chọn Trusted site ⇒ Sites ⇒ Thêm địa chỉ web vào ⇒ ấn Add ⇒ OK (thường khi vào web sẽ có pop-up hiện lên cảnh báo bạn có thể add luôn mà không cần chạy các bước trên).
Trên đây là hướng dẫn cơ bản để cài Chrome cho WinServer. Xong các bước trên là bạn hoàn toàn có thể cài đặt như bình thường.
Ngôn ngữ mặc định của hệ thống Win10 là tiếng Anh, trong quá trình sử dụng bạn có thể thay đổi sang ngôn ngữ khác như tiếng Việt, tiếng Trung… theo mong muốn. Tại bài viết này, TotHost sẽ hướng dẫn bạn cách thay đổi ngôn ngữ trên Wins 10 đơn giản và chi tiết nhất.
Việc thay đổi mật khẩu là biện pháp quan trọng để tăng cường bảo mật và tránh được những rủi ro không mong muốn. Do đó, bước đầu tiên nên làm sau khi đăng ký dịch vụ là đổi mật khẩu. Bạn hãy làm theo hướng dẫn của TotHost để thay đổi mật khẩu trên server Linux nhé!
Khi bạn kết nối máy tính hoặc thiết bị của mình với internet, bạn cần có địa chỉ IP. Địa chỉ IP có hai loại phân bổ là động và tĩnh. Tại bài viết này, TotHost sẽ hướng dẫn bạn Cách kiểm tra địa chỉ IP bạn đang sử dụng là động hay tĩnh.