TOT W: Surf the overseas cloud using TotHost VPS
14/05/2026

Đang Tải...
19/07/2024
The following is the most basic guide on how to buy as well as how to manage and use TOT VDC service (TotHost Virtual data center).
Mục lục
Mục lục
Step 1: Choose VDC on demand
Access into the TOT VDC page on TotHost CloudGate. Here, you can optionally choose VDC with the configuration and number of IPs that suit your needs. Then, proceed to pay for the order as usual.
Step 2. Submit a resource setup request
After completing the payment, please create a ticket to send your VDC configuration request, including: the number of VMs (Virtual Machine) and the number of RAM, CPU, Disk, IPs each VM. Within 12 hours, the VDC and VMs will be set up according to your requirements.
For example: You buy VDC 01 and want to use all resources in only one 1 VM, send a ticket with the content: 1 VM: 5 vCPU, 10 GB RAM, 100GB SSD DISK, 8 IPv4
Step 3. Where to get VDC information?
When setup is completed, you will receive VDC information via Ticket and Email. Please access our ONGate to continue managing and using your VDC.
All TotHost's VDCs are controlled at one portal gate: ON Gate: https://on.tothost.vn/login.
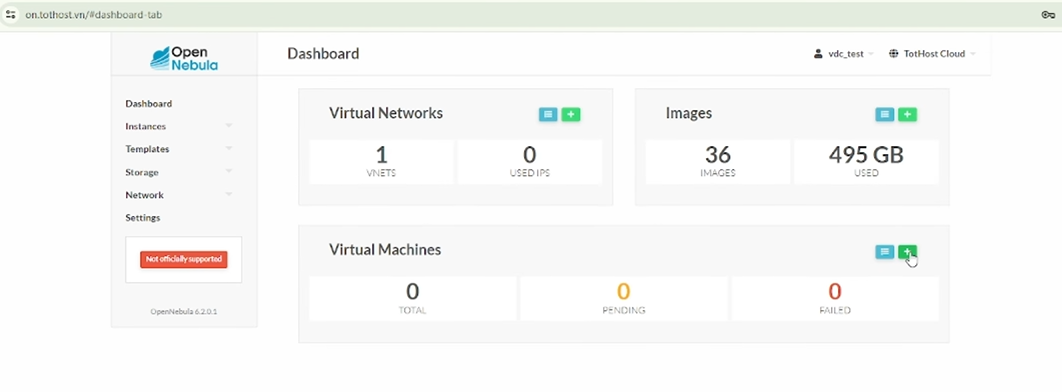
After sign in the ON Gate, you will see the Client's Dashboard with:
On the left column, there are several user-manageable functions:
Access the VMs monitoring page (https://on.tothost.vn/#vnet-tabs). In here, you would see all VMs which were created from your VDC. Need to customize or monitor any VM, click on that VM and you will be taken to the VM management interface.
In the bar at the top, there are some basic features:
Management tabs:
Step 1: Click the "+" sign in the Virtual Machines section.
Step 2: Select the OS from the Template list and fill in the configuration details for the VM you want to create.
Step 3: Set up the IP and network under the Networks section, in the Interface section:
After completing the settings, click the green Create button on the top left to initialize the server. The server will be initialized within a few minutes.

Once the VM has been created and its status is Running, you can add multiple IPs by following these steps:
Access the VM and go to the Network section.
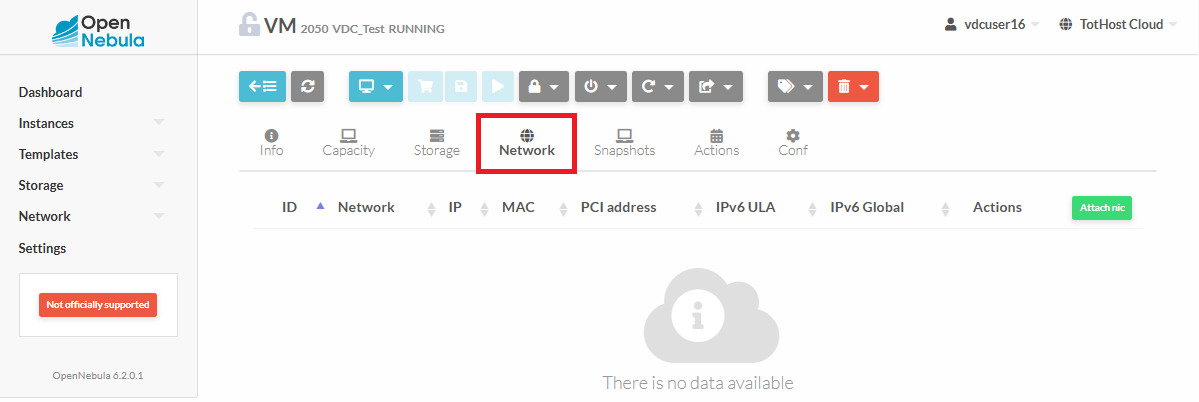
Select Attach NIC -> Choose an IP Pool.
Check the box Select attach as alias.
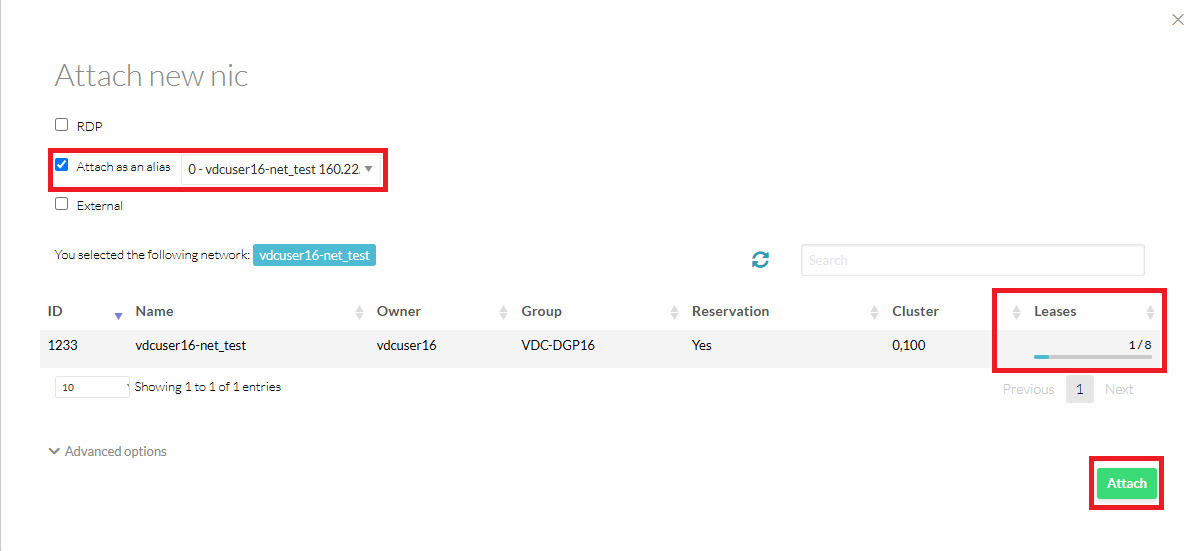
The Lease section will display the number of IPs you can add.
Click the Attach button to add the IP to the VM (You can only add 1 IP at a time).
Repeat these steps until the VM has the required number of IPs.
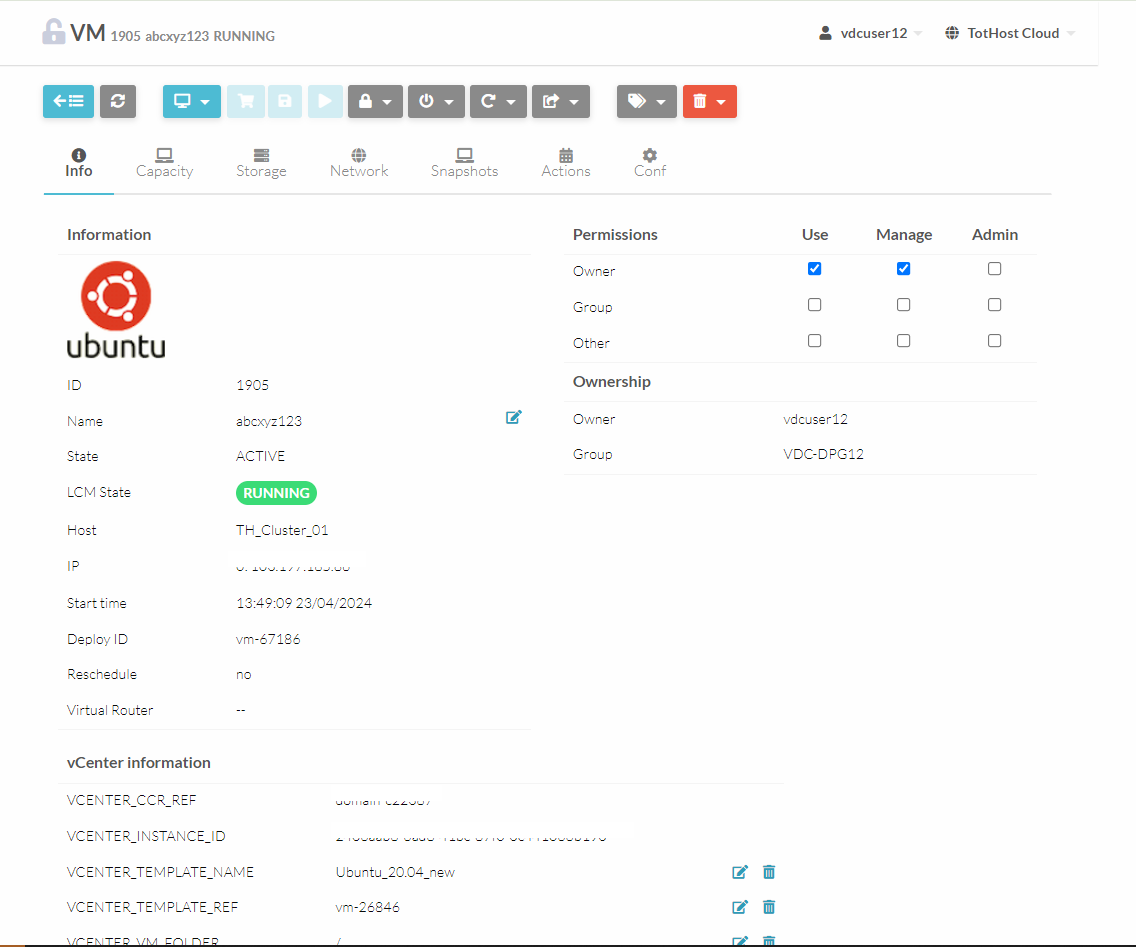
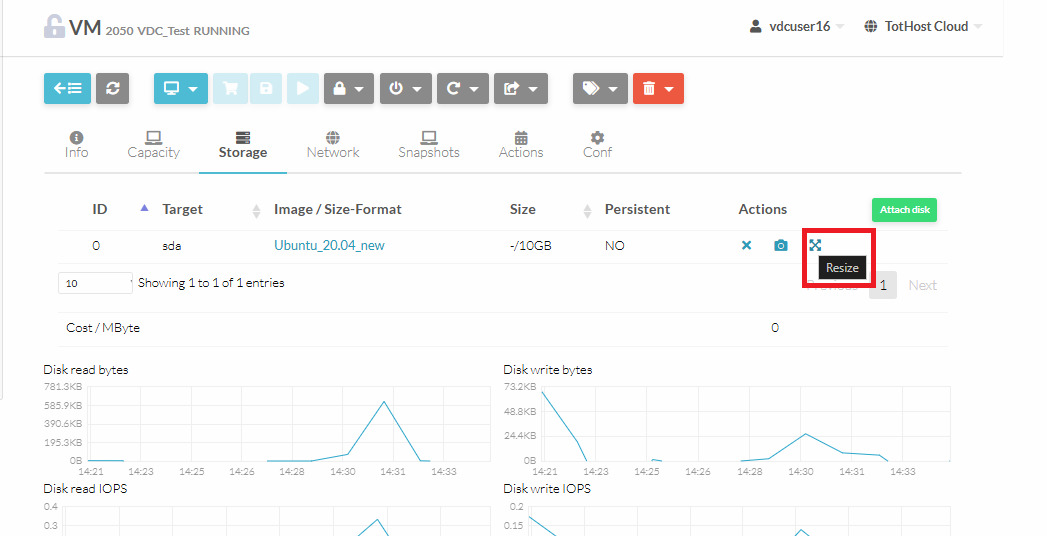
After the virtual machine has been created, click the Resize icon with the arrow pointing outwards, as shown in the image, to increase the disk size.
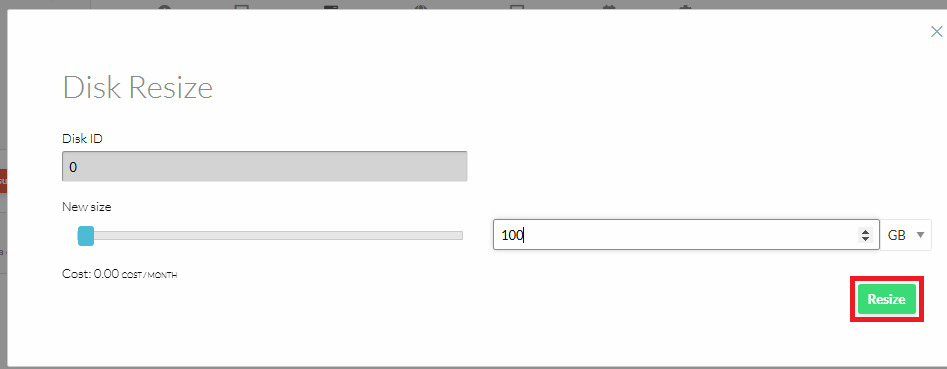
Select the desired disk size and click Resize.
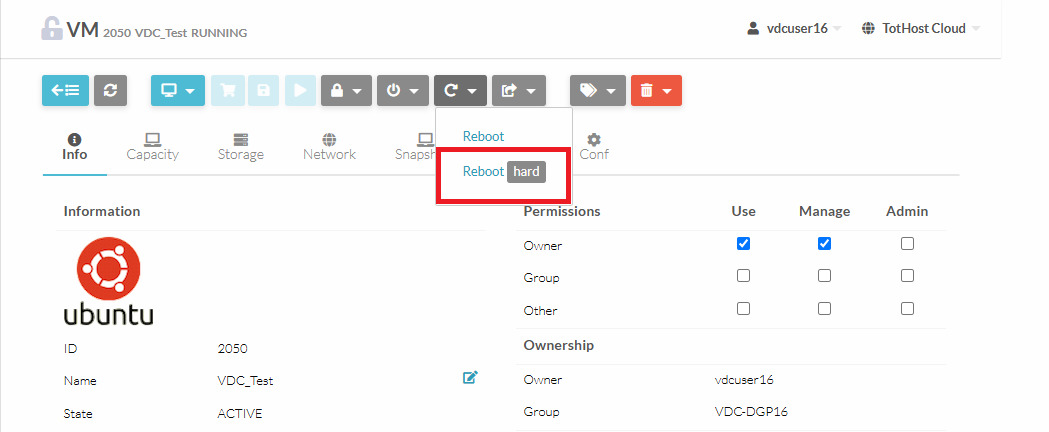
After resizing, a Restart is required for the VM to recognize the new disk size.
Click the Reboot Hard button, wait for the system to restart, and your VM will be set with the new disk size.
You can see more instructions in the video below:
TAG: totdoc