The default system language on Windows 10 is English. However, during use, you can switch to another language, such as Vietnamese, Chinese, etc., according to your preference. In this article, TotHost will guide you through the simplest and most detailed steps to change the language on Windows 10.
In this guide, TotHost will demonstrate the steps on a Cloud VPS running Windows 10. Similarly, you can follow the same steps on any VPS or personal computer using Windows 10.
Things to Keep in Mind Before Changing the Language on Windows 10
Firstly, close all running applications and software. Once the system language has been successfully changed, all system elements such as Settings, File Explorer, Desktop, Web Browser, etc., will switch to the newly installed language.
Step-by-Step Guide to Changing the Language on Windows 10
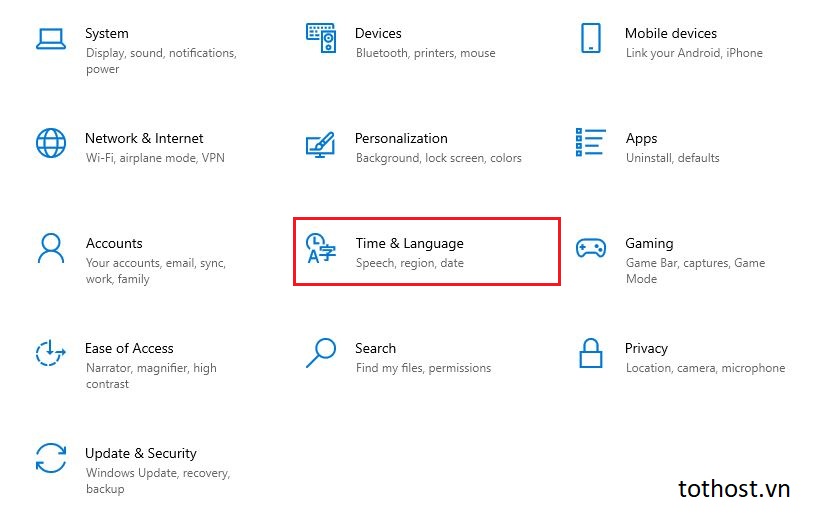
Step 1: Open Settings and Select "Time & Language"
Step 2: In the "Language" Section, Click "Add a Preferred Language"
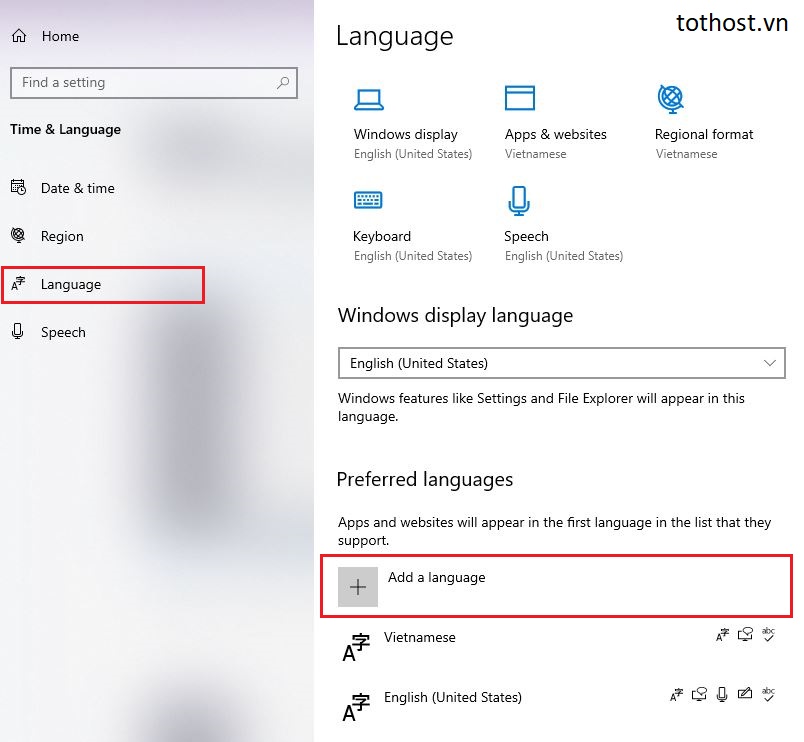
This option allows you to add a new language. The system will require downloading the new language pack for Windows 10.
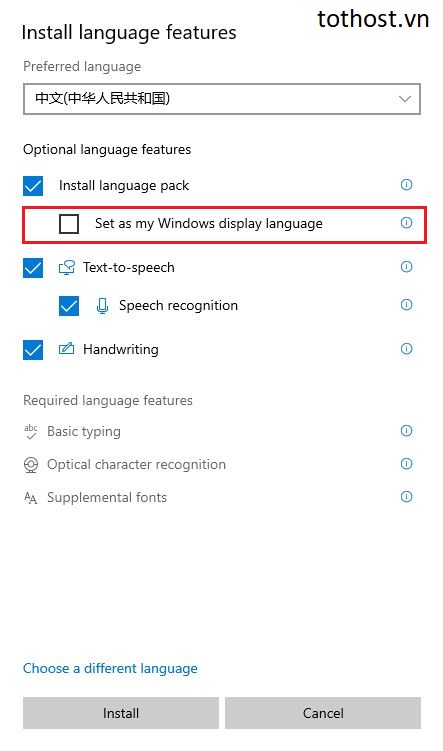
Step 3: Select Your Desired Language and Click "Next"
For example, in the image below, Chinese (中文) is selected. (*Note: You must check the box "Set as my display language").
Next, click "Install" to allow the system to install the language pack. This process may take a few minutes.
Step 4: Confirm and Restart
Once the installation is complete, a notification will appear. Click "Yes, Sign out now". The system will then restart and apply the new language.
That’s how you can change the system language on Windows 10 in a simple and detailed manner. Hopefully, this guide will help you successfully switch to your desired language while using Windows 10!